User Guide
Overview
InfoCDC is a lightweight simple to implement Change Data Capture (CDC) tool that companies can use to detect and stream relevant data changes from their IBM i (formerly known as AS400, iSeries) applications without any custom IBM i development required.
CDC solutions currently available on IBM i platform typically require extensive planning and implementation, specialized skills, and are rather heavy and expensive to operate. InfoCDC is designed to be an intuitive, lightweight solution that provides the core data integration capabilities at a fraction of the cost of competing products
Sample Use Cases
Below are some examples where real time replication flows deliver better customer experiences or improve the process quality and operational efficiency:
- send order fulfillment status changes from the IBM i ERP or WMS system to the CRM, ecommerce or third party partners
- propagate product details from IBM i based ERP to external MDM and PIM solutions
- send customer details from IBM i based solution to external Customer Data Platform
- replicate IBMi data to datawarehouse in near real time
- develop a data pipeline for AI model training
Product Features
- Real time Change Data Capture agent continuously listens for IBM i journal entries (not a periodic polling of the journal data, no polling interval or delays!)
- Non-intrusive low system impact change detection leveraging IBM i journals
- Easy setup and configuration, auto-creation of all required components such as data queues, format tables, and flow definitions
- Ability to configure tables and individual columns to replicate
- Auto-detect primary keys and unique keys and let users define custom keys for legacy files
- Listen for changes in specific columns and ignore irrelevant changes
- Support for both commitment control (commits / rollbacks) and auto commit changes
- Data Queue messages align with the IBM i Format Table data structure, passing the data in a compact, easy to deserialize, binary format.
- Snapshot support for the initial data load
- Automatic type translation by Infoview Kafka and Mulesoft connectors
- Support for Acknowledgements and Retries
- Support for Double Byte Character Sets (Japanese, Korean, Chinese etc) and Graphics columns
- Support is provided by the same product engineering team that develops and maintains the product, ensuring fast response and resolution.
How does it work?
The product leverages IBM i DB2 journals to receive database changes and determine if they have to be sent to external clients or not based on the filtering rules. The changes are streamed via IBM i Data Queues - native lightweight messaging queues. Therefore, the InfoCDC would in most cases be used in conjunction with our Kafka or Mulesoft or the upcoming AWS or Azure connectors. These connectors would be configured to continuously listen for new data queue entries and process that change based on the requirements.
IBM i requirements and considerations
- Minimal supported OS release level is 7.1
- All IBM i tables in scope for CDC must be journaled with AFTER or BOTH record images captured. NOTE: When table is journaled with *AFTER image, it is not possible to process Delete operations (as the value of the key before deletion is only captured in the BEFORE image), and it is not possible to include any filtering based on the specific column changes.
- Table must have either a primary key or a unique key constraint in order to apply the change correctly on the target system. In case of legacy tables / files without any unique or primary constrains available, InfoCDC supports user-provided composite key configuration.
- Null-capable columns are not supported in the current release, the support will be added in future releases
- BLOB and CLOB columns are not yet supported - let us know if you need it and check back often!
Installation Instructions
- Pre-requisite: contact Infoview sales team to receive the application save file and generated trial license
- Upload the product save file to your IBM i system
-
Restore the content of the save file in QGPL library
RSTOBJ OBJ(*ALL) SAVLIB(QGPL) DEV(*SAVF) SAVF(QGPL/CDCPKGSAVF) -
Add installation library to the library list.
- All CDC SAVF files are now available in QGPL. So, need to check library QGPL is in library list.
-
Run the installation script
Execute the command CDCINSTALL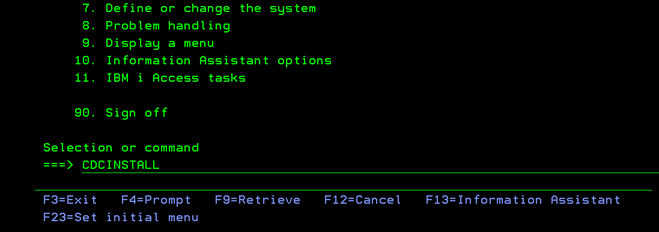
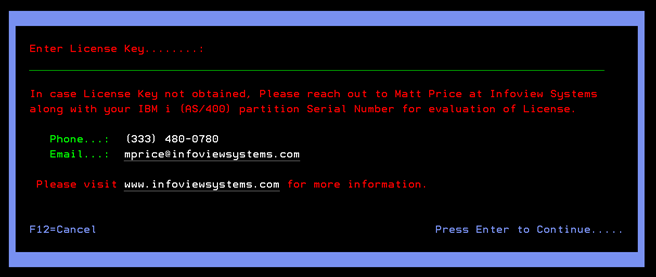
-
Enter the license string and continue
- Provide the License Information here
-
Validate the installation
- Confirmation screen displayed
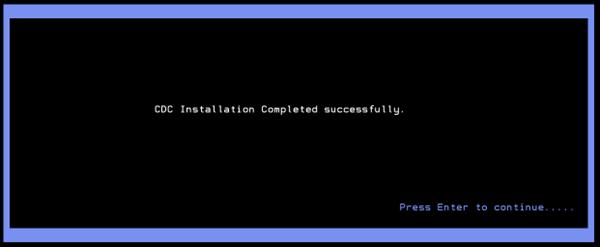
Press enter, then CDC main manu screen will be displayed
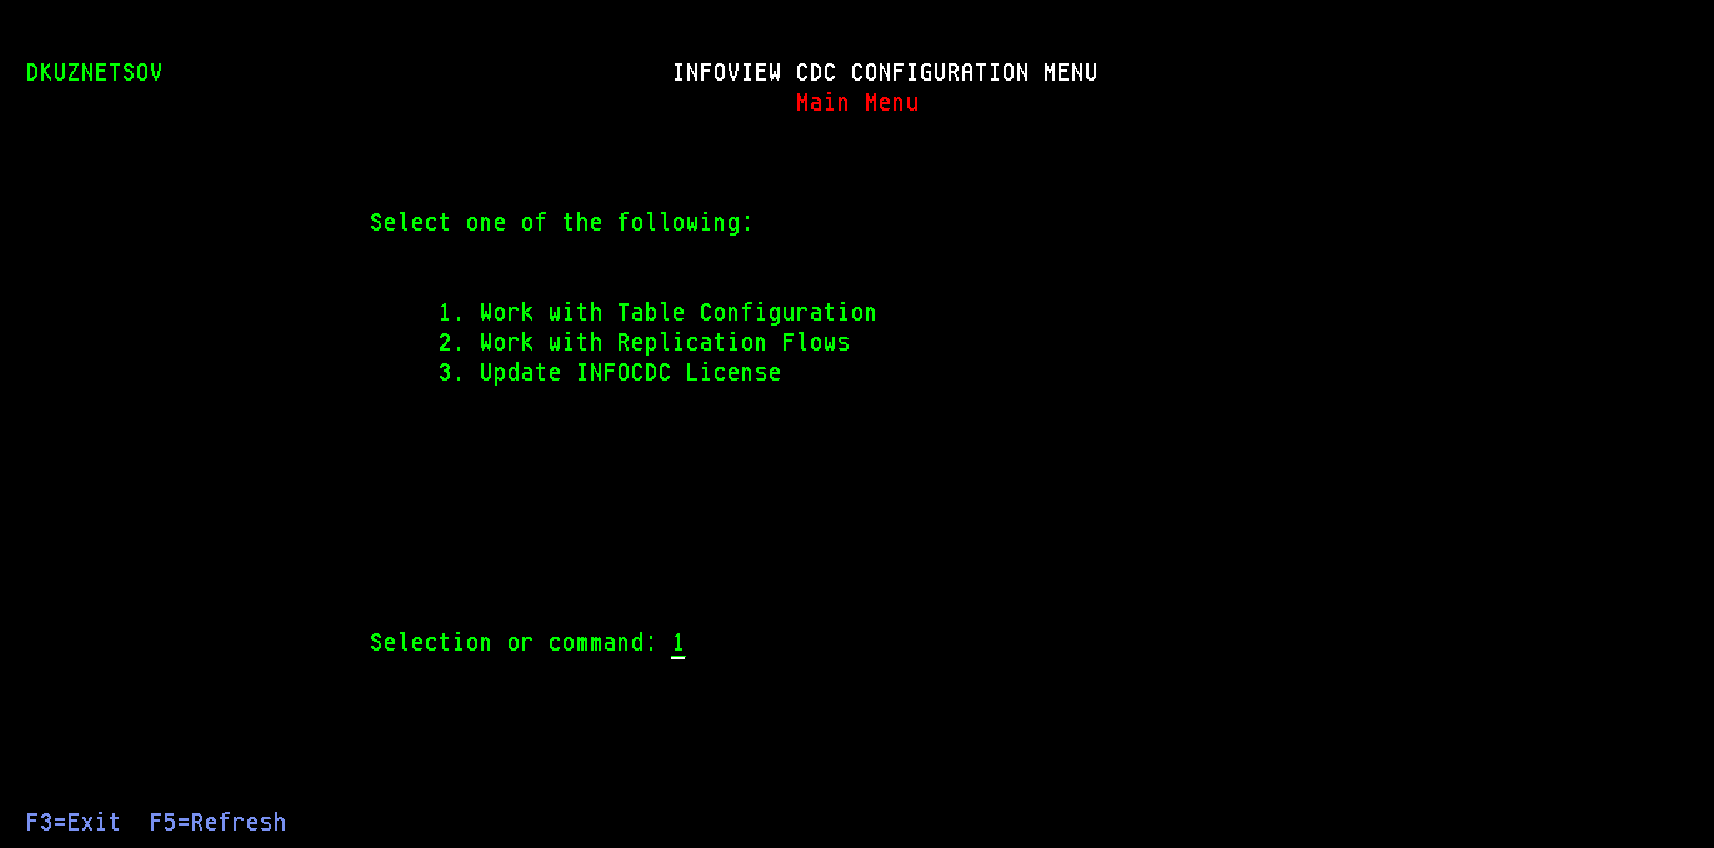
-
Verify the CDC environment by selecting option 1
At any time, CDCMAINMNU command can be executed to back to CDC Main Menu. To do so, add library INFOCDCCOM in the top of the library list
ADDLIBLE LIB(INFOCDCCOM)Press enter key, then CDC main menu screen will be displayed
-
Configure the auto-start job to automatically start the replication flows when the CDC subsystem starts either after IPL or after maintenance period
- First, create a job description for starting the jobs
CRTJOBD JOBD(INFOCDCCOM/CDCSTARTJD) JOBQ(QSYS/QSYSNOMAX) TEXT('Autostart Job Start InfoCDC Command JOBD') USER(<include-system-user>) RQSDTA('INFOCDCCOM/CDCSTART')
Note - the JOBD can be created in other libraries, depending on the IBM i operational standards for your environment. The user ID should have enough authority to start the replication flows.
- Then add the auto-start job entry to CDCSBSD subsystem
ADDAJE SBSD(CDCSBSD) JOB(CDCSTART)
JOBD(INFOCDCCOM/CDCSTARTJD)
- First, create a job description for starting the jobs
-
Configure the monitor job that starts the CDC workflow jobs if needed - this will auto-recover the process if anybody accidentally ends the replication jobs. Please adjust the frequency and start of the job or add it as a Robot task or advanced job scheduler task hourly or every X minutes as necessary.
ADDJOBSCDE JOB(CDCJOBCHK) CMD(INFOCDCCOM/CDCSTART) FRQ(*WEEKLY) SCDDATE(*NONE)
SCDDAY(*ALL) SCDTIME('08:00:00')
InfoCDC Configuration
To access the main InfoCDC menu, execute the following commands in the IBM i environment where the product is installed:
    ADDLIBLE INFOCDCCOM
    CDCMAINMNU
Main application menu consists of two options:

Table maintenance
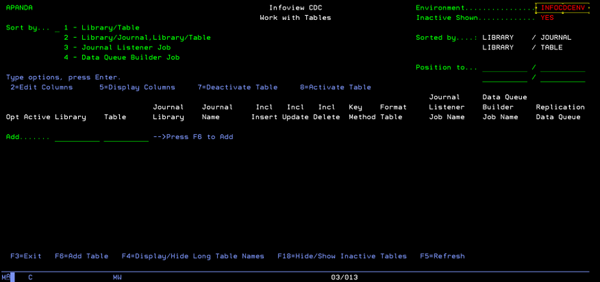
To add tables to the CDC process, select option 1 (Work with Table Configuration). On the Work with Tables screen you can define new table and work with table configurations
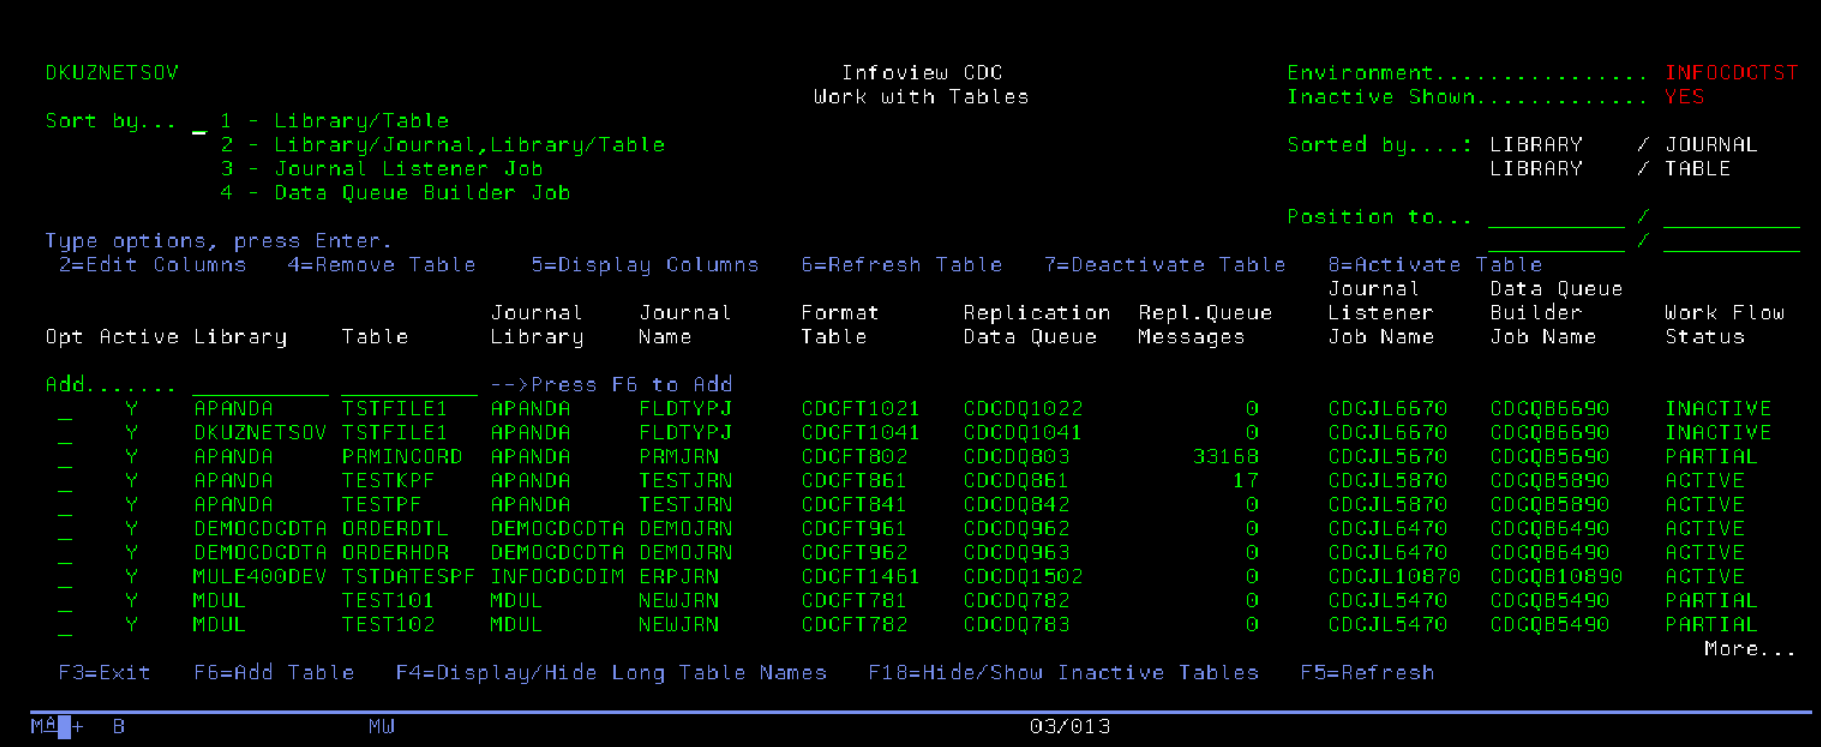
On the table maintenance screen, type the library and table name then press F6 to add a new table
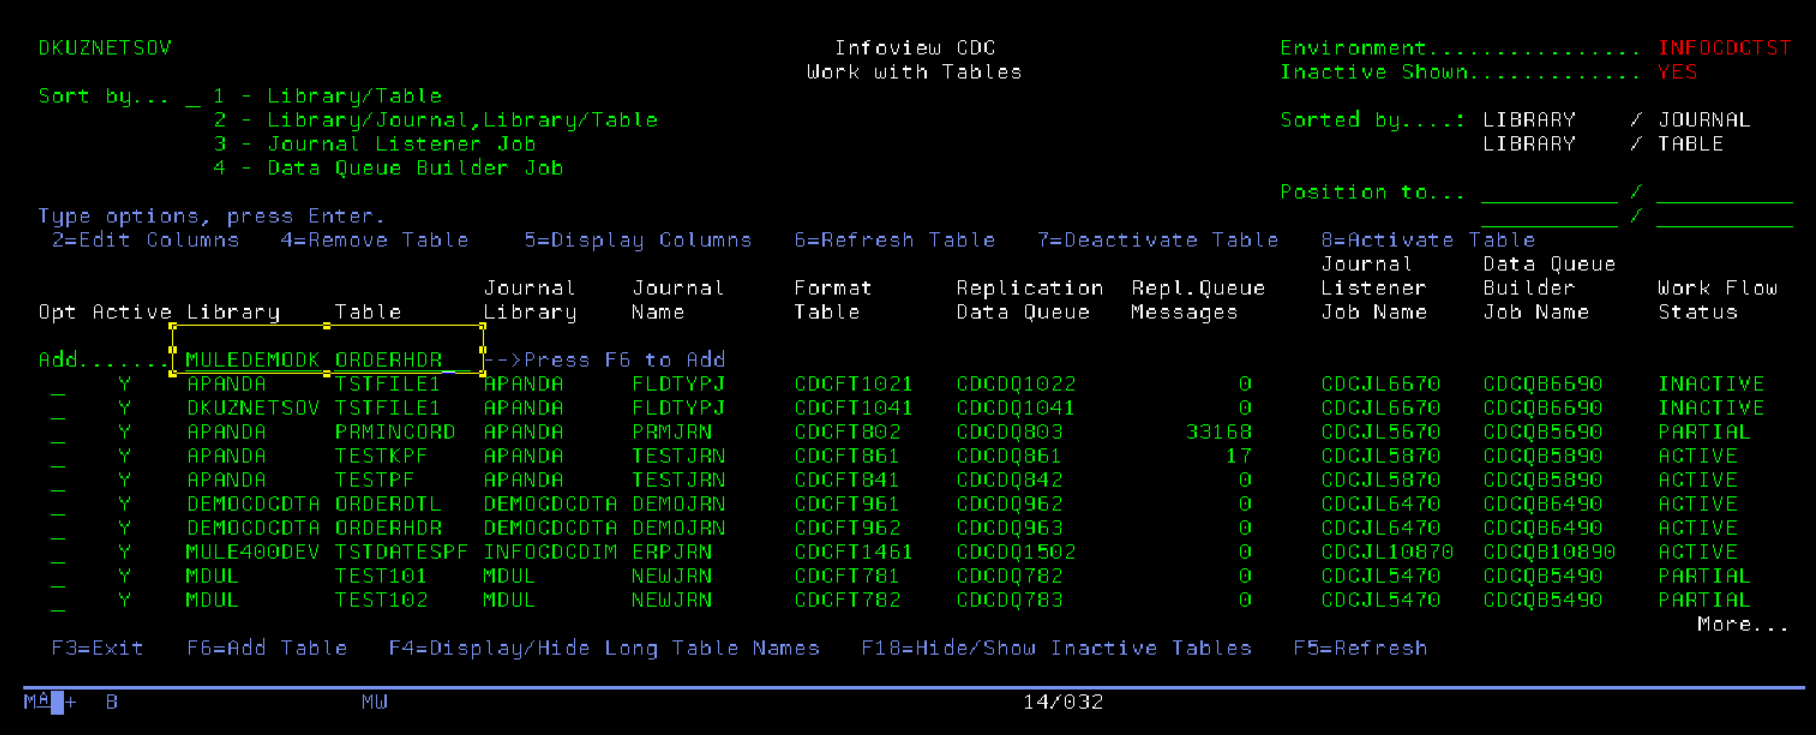
The product will automatically retrieve the configuration, column structure, primary key etc. On this screen, we can configure the operations we want to listen for (Insert, Update and / or Delete), as well as columns for filtering the changes (or all for any change) and columns to replicate (or all for synchronizing all columns). It is also possible to set the "Expect Acknowledgement" flag to Y to activate the retries processing.
In the example below we define new Inventory table and send the inserts, updates and deletes. Once the configuration is ready, press F10 to save and auto-generate required objects.
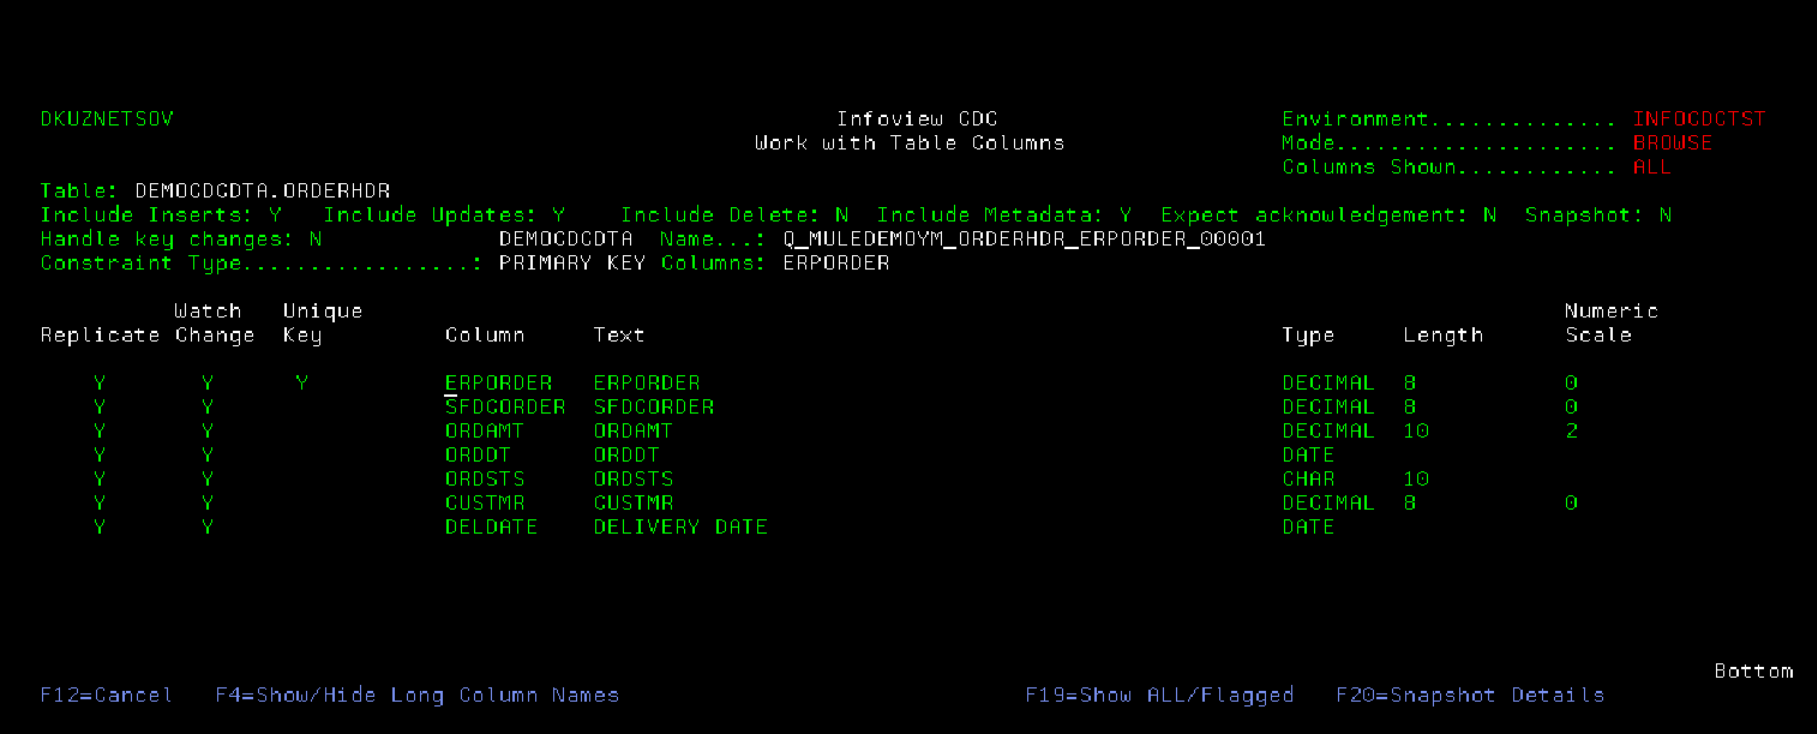
Most applications and database models prevent any UPDATE operations for unique key columns. If the business entity needs to change its unique identifiacator, the entity is deleted then recreated. In case the application does not prevent users from changing the values of primary key columns, infoCDC can either treat it as an UPDATE, or, when Handle Key Changes flag on the table maintenance screen is set to Y, it will generate the DELETE for the old key and INSERT for the new key value. There is a performance benefit of not checking for key changes, so for tables where key changes are not allowed we recommend setting the Key Changes flag to N. InfoCDC will not compare before / after key values, which will increase the overall throughput.
When adding a table for the first time, it may be necessary to send the entire content of the table to the middleware and on to the target systems first before turning on a real time replication. To request the snapshot, press F20 on the Table Details screen to access Snapshot Details screen, and set Snapshot flag to Y. When the workflow is started it will first capture the data currently in the table (or a subset of the data if the optional selection criteria is supplied). By default the flag will be reset to N after the snapshot run is completed, and can be overriden by "Request snapshot on each run" flag. It is also possible to instruct InfoCDC to ignore any errors related to snapshot capture and just start the replication flow.
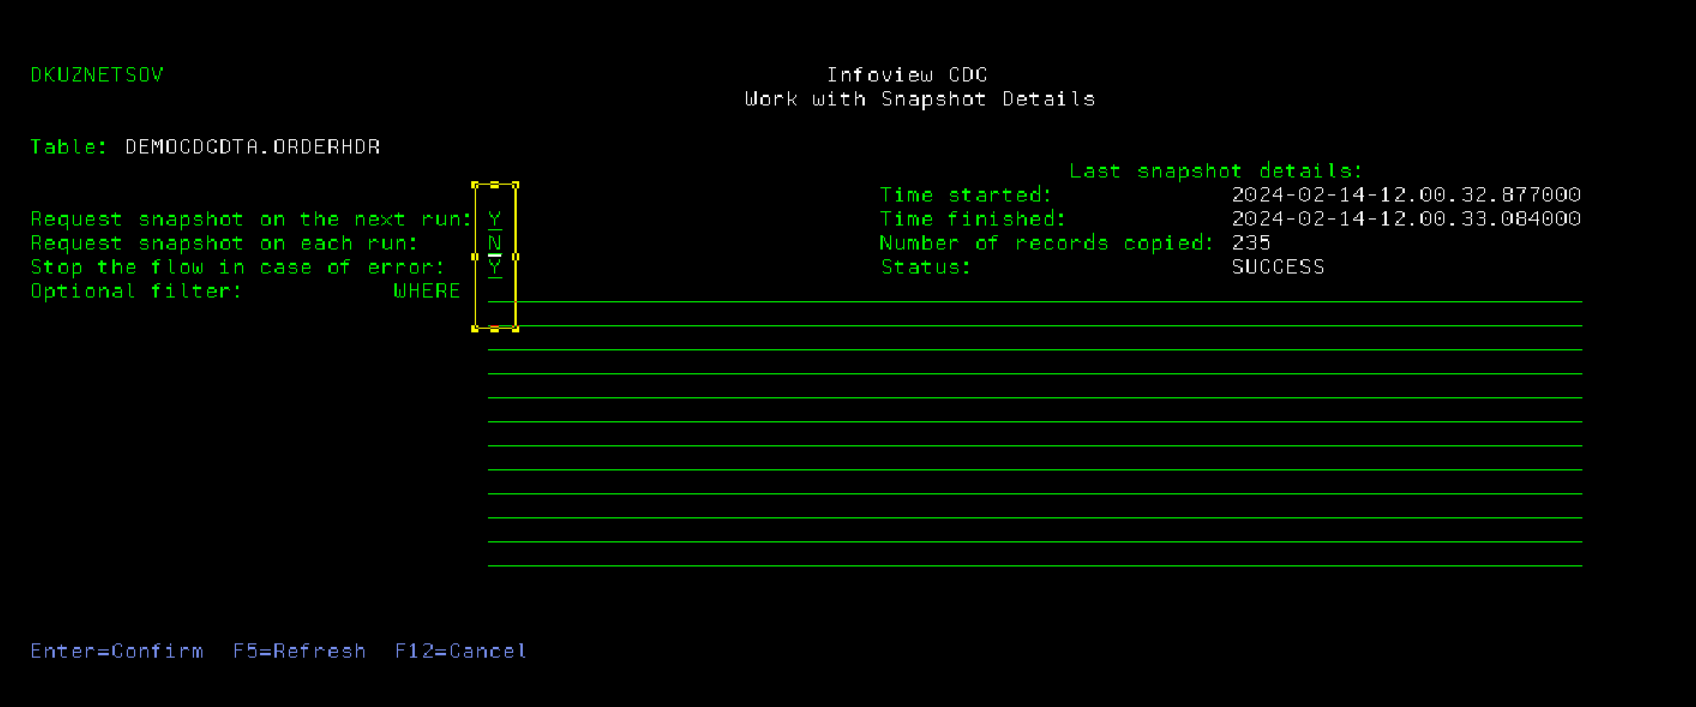
Press Enter to save the Snapshot configuration, then F12 to exit back to Table Details page. When the table configuration is saved after pressing F10, the product will perform the following steps:
- Auto-detect the Journal associated with the table
- Auto-generate the Format table - the empty table that reflects the structure of the data queue message for this particular table
- Auto-generate Journal listener job name (the job that will listen for journal changes)
- Auto-generate the Replication Data Queue (the DQ that the external client will be polling)
- Auto-configure the Replication Flow configuration if not already defined
The Kafka or Mulesoft configuration will need the Format table name and Replication Data Queue name in library INFOCDCDTA in order to start listening for the changes.
When the replication flow starts, it will check if the snapshot is required, and will process the initial data load first then start the journal listener job.
In order to apply configuration changes to the tables that are currently being replicated, user needs to stop the replication flow first (see the Replication Flow Management section below).
Use option 4 to remove the table from InfoCDC flow. The option will remove the table definition, as well as all auto-generated objects (data queues, format files, job queues, and replication flow definitions if this is the last table for given journal).
Use option 6 to refresh table definition. It will pull the latest and greatest table structure and associated journal, and will re-build the format file. If the table is now journaled to a different journal, InfoCDC will auto-create a replication workflow for that journal, along with necessary objects such as staging data queue and replication job queues.
Replication Flow Management
Option 2 on the main InfoCDC menu brings us to the Replication Flow Management screen:
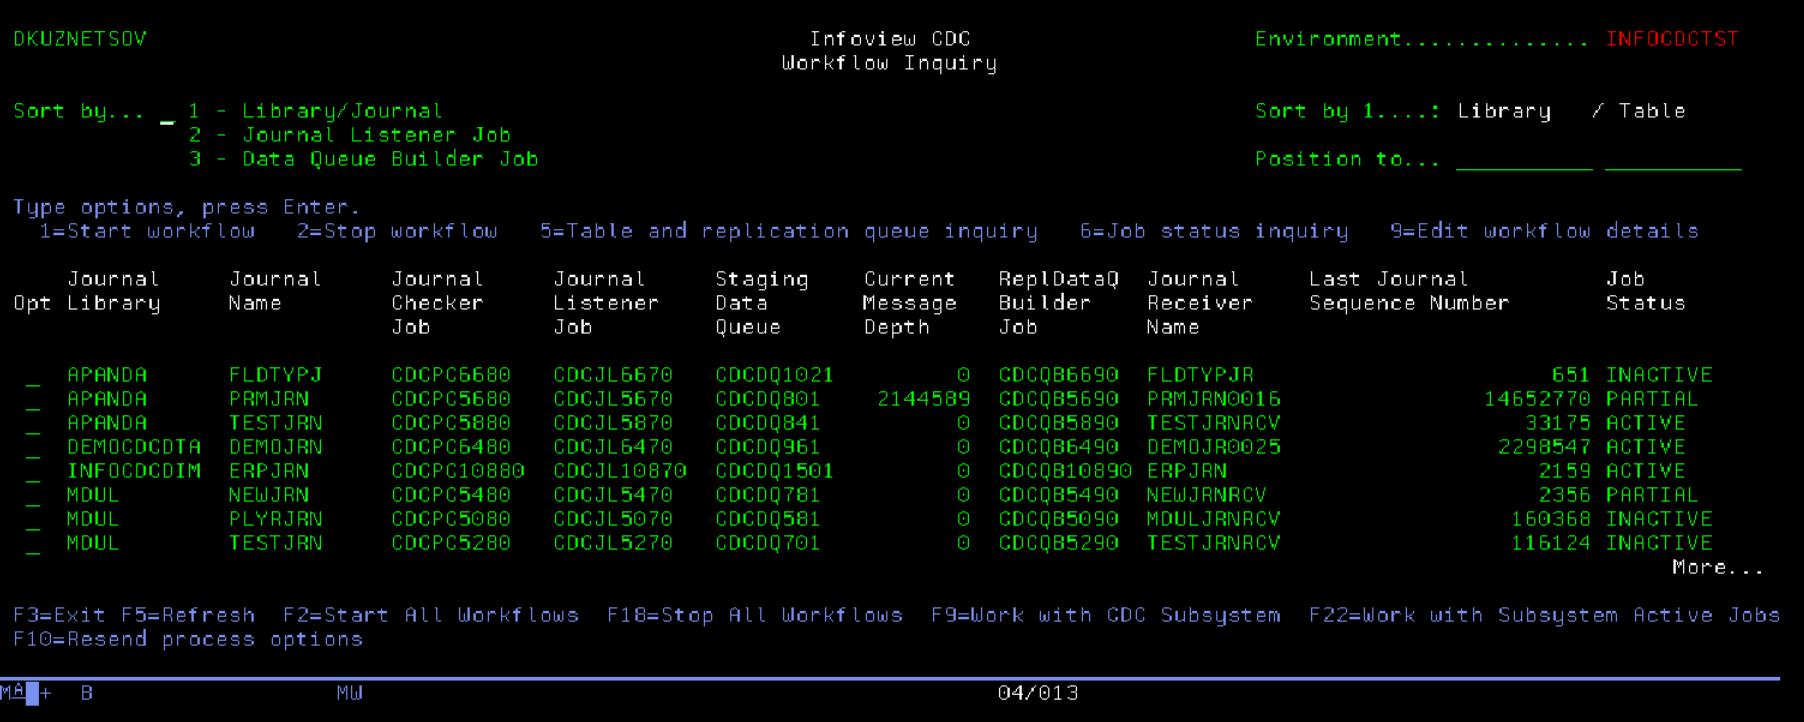
When the table is added to the configuration, the Workflow entry is automatically added to this screen if not already defined. Multiple tables journaled into a single journal will have a single Replication flow entry on this screen. Initially, the workflow will be added in INACTIVE status to allow the CDC client (Kafka flows or Mulesoft apps) to connect to the appropriate DQ and start listening. When everything is ready, start the flow using option 1, or use function key F2 to start all inactive workflows in one step. Press F5 to refresh the screen and ensure the intended flows are active.
Sometimes it is necessary to replay the journal entries from the earlier point in time, for example when the target systems request to resend and reprocess the historical data. Use option 9 of workflow management screen to reset sequence number. It is important to note that the requested journal sequence number must exist in the specified journal receiver.

InfoCDC workflow "remembers" the last successfuly processed journal receiver and journal sequence number. When the workflow starts, it will attempt to start with the next available sequence number to ensure no data loss. The receiver management policy must allow for sufficient time the receivers remain available in the system to ensure the starting journal sequence number is still available. In case the receiver has been deleted, InfoCDC will start with the first available record in the currently attached receiver.
InfoCDC will automatically recognize when the receivers are swapped, and will continue with the next journal receiver in the chain, whether it's a current or already detached one.
Acknowledgements and Guaranteed Delivery
For scenarios that require end to end delivery guarantees, InfoCDC tables can be configured to require acknowledgements from the Data Queue consumers (Mulesoft or Kafka connectors or InfoConnect Hub or other DQ listener process). For that, use Expect Acknowledgement flag on the Table Maintenance screen.
When InfoCDC sends the change to the Data Queue for the tables with Expect Acknowledgement flag turned on, it internally sets the entry status to ACK_PENDING. The client needs to call the acknowledgement program INFOCDCCOM/CDCPGMACKR that sets the entry status after the change was applied to the target system or passed to the transactional message store such as Kafka or ActiveMQ. Below are the program call parameter details:
| Name | Type | Length | In / Out | Notes |
|---|---|---|---|---|
| Staging ID | String | 20 | IN | Populated with InfoCDC entry ID (PROCESSID field in the format file) |
| Acknowledge Status | String | 15 | IN | Populate with Success |
| Acknowledge Message | String | 254 | IN | Optional description field |
| Return Status | String | 15 | OUT | Success or Fail |